
USER MANUAL
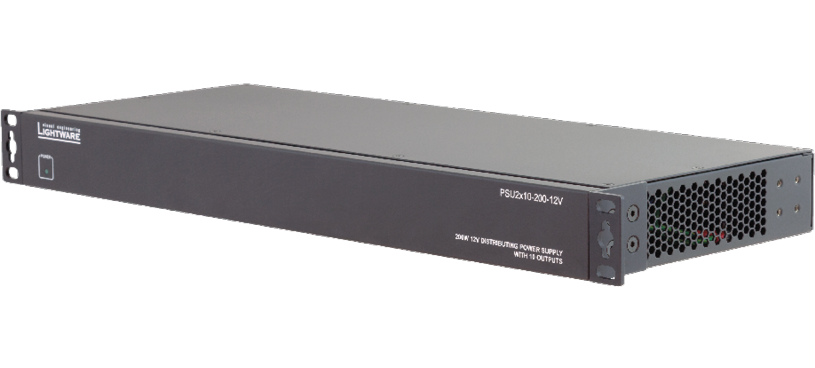
PSU2x10-200-12V
PSU2x10-200-5V
PSU2x20-400-12V
PSU2x20-400-5V
Rack Mountable Power Supply Unit
|
|
|
|
||
|
|
|
|
||
|
|
|
|
||





|
|

Class I apparatus construction.
This equipment must be used with a mains power system with a protective earth connection. The third (earth) pin is a safety feature, do not bypass or disable it. The equipment should be operated only from the power source indicated on the product.
To disconnect the equipment safely from power, remove the power cord from the rear of the equipment or from the power source. The MAINS plug is used as the disconnect device, the disconnect device shall remain readily operable.
There are no user-serviceable parts inside of the unit. Removal of the cover will expose dangerous voltages. To avoid personal injury, do not remove the cover. Do not operate the unit without the cover installed.
The appliance must be safely connected to multimedia systems. Follow instructions described in this manual.

Ventilation
For the correct ventilation and to avoid overheating, ensure enough free space around the appliance. Do not cover the appliance, leave the ventilation holes free and never block or bypass the ventilators (if there are any).
WARNING
To prevent injury, the apparatus is recommended to be securely attached to the floor/wall, or mounted in accordance with the installation instructions. The apparatus shall not be exposed to dripping or splashing, and no objects filled with liquids, such as vases, shall be placed on the apparatus. No naked flame sources, such as lit candles, should be placed on the apparatus.
Replacing the AC fuse (if any)
Unplug the AC power cord from the device. Locate the AC fuse on the rear panel. Replace only the AC fuse as indicated on the rear panel. Connect the power cord to the switcher and to the AC power source. Make sure the switcher is working properly.
Waste Electrical & Electronic Equipment (WEEE)

This marking shown on the product or its literature indicates that it should not be disposed with other household wastes at the end of its working life. To prevent possible harm to the environment or human health from uncontrolled waste disposal, please separate this from other types of wastes and recycle it responsibly to promote the sustainable reuse of material resources. Household users should contact either the retailer where they purchased this product or their local government office for details of where and how they can take this item for environmentally safe recycling. Business users should contact their supplier and check the terms and conditions of the purchase contract. This product should not be mixed with other commercial wastes for disposal.
Common Safety Symbols
|
Symbol |
Description |

|
Direct current |

|
Alternating current |

|
Protective conductor terminal |

|
Equipotential Connector |

|
On (Power) |

|
Off (Power) |

|
Double insulation |

|
Caution, possibility of eletric shock |

|
Caution |

|
Laser radiation |

|
Warning, Rotating fan |

|
Caution: for indoor use only |
Document Revision History
|
Rev. |
Release date |
Changes |
Editor |
|
v1 |
2026-04-10 |
Initial release |
Tamas Forgacs |
|
v2 |
2026-09-10 |
ToC correction. |
Laszlo Zsedenyi |
Contact Us
+36 1 255 3800
+36 1 255 3810
Lightware Visual Engineering PLC.
Gizella 51-57, Budapest H-1143, Hungary
©2026 Lightware Visual Engineering. All rights reserved.
All trademarks mentioned are the property of their respective owners.
Specifications are subject to change without notice.
Thank you for choosing Lightware’s PSU2x series devices. In the first chapter we would like to introduce the device by highlighting the most important features in the sections listed below:
Thank you for choosing Lightware’s rack mountable power supply. The units are all housed in a 1U high solid metal rack enclosure for durability and easier mounting. 5V and 12V DC output versions are also available with 10 and 20 output connectors. Several protections are built in like short circuit, overload, over voltage, over temperature which features make these PSUs really trustful. The units are designed to supply devices made by Lightware.
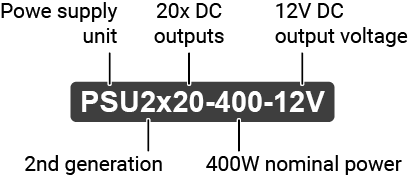
Model Denomination
About the Serial Number
Lightware devices contain a label indicating the unique serial number of the product. The structure is the following:
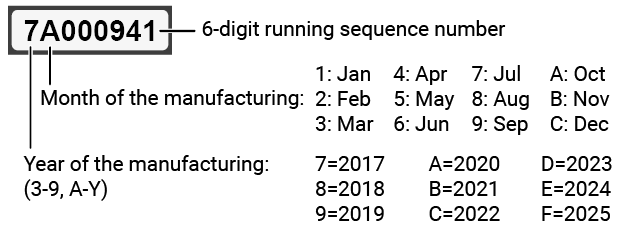
From 1st of October 2024, serial number format of Lightware devices is the following: the first two digits are of the year of manufacture, while the remaining digits make up the running sequence number.

Optional accessories can be purchased separately, please contact sales@lightware.com.
|
PSU2x10-200-12V |
PSU2x10-200-5V |
PSU2x20-400-12V |
PSU2x20-400-5V |
|||
|---|---|---|---|---|---|---|
|
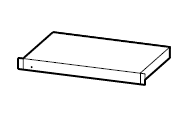
Supplied device |
|
Power supply unit with rack ears (2x) |
|
|
|
|
|
Supplied accessories |
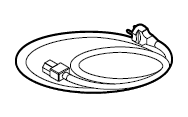
|
IEC power cable |
|
|
|
|
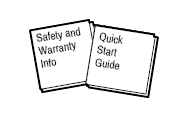
|
Safety & Warranty Info; Quick Start Guide |
|
|
|
|
|
|
Optional accessories |
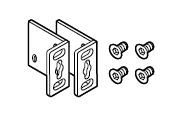
|
Rack ears with M4x8 screws |
|
|
|
|
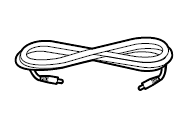
|
DC-DC power cable |
|
|
|
|
|
|
Power supplement parameters |
Mounting options |
||||||
|---|---|---|---|---|---|---|---|
|
Output voltage |
Number of DC outputs |
Nominal power |
Rack mountable |
||||
|
5V |
12V |
200W |
400W |
||||
|
5V power supply |
PSU2x10-200-5V |
|
- |
10 |
|
- |
|
|
PSU2x20-400-5V |
|
- |
20 |
- |
|
|
|
|
12V power supply |
PSU2x10-200-12V |
- |
|
10 |
|
- |
|
|
PSU2x20-400-12V |
- |
|
20 |
- |
|
|
|
The following table contains those Lightware products that are compatible with the power supplies and also the technical data of the DC plug.
|
PSU2x10-200-5V PSU2x20-400-5V |
||
|
DC plug |
Compatible Lightware products |
|
|
Power supply |
Device |
Type |
|
2.5 / 5.5 mm |
1.35 / 3.5 mm |
DVI-OPT-110 series DP-OPT 150 series |
|
USB Micro-B |
DVI-HDCP-OPTS 90 series DVI-HDCP-OPTM 90 series |
|
|
2.5 / 5.5 mm |
EDID Manager V4 HDMI-, DVISL- and DVIDL extenders HDMI-3D-OPT series DA2DVI-HDCP-Pro DA2DVI-DL DA2HDMI-4K-Plus series DP-OPT-100 series HDMI-, UMX- and DVIDL-OPT series HDMI 4K series SW4-OPT-TX240RAK Remote control panels |
|
|
PSU2x10-200-12V PSU2x20-400-12V |
||
|
DC plug |
Compatible Lightware products |
|
|
Power supply |
Device |
Type |
|
2.1 / 5.5 mm |
2.1 / 5.5 mm |
DP-TPS-200 series DVI-HDCP-TP-50 and -100 series DVI-HDCP-TPS-90 and -210 series HDMI-TP-50, -100 and -200 series HDMI-TPS-TX200 series HDMI-TPS-90-95-96-97 series HDMI-TPS-RX110AY series HDMI-TPX-100 series HDMI-TPN series HDMI-OPTX series HDMI-OPTN series HDMI-UCX-TPX-RX107 UMX-TP series UMX-TPS-TX100 series TPS-TX200 series MMX4x2 series SW4-TPS-TX240 |
The following sections are about the physical structure of the device, input/output ports and connectors; hardware capabilities:
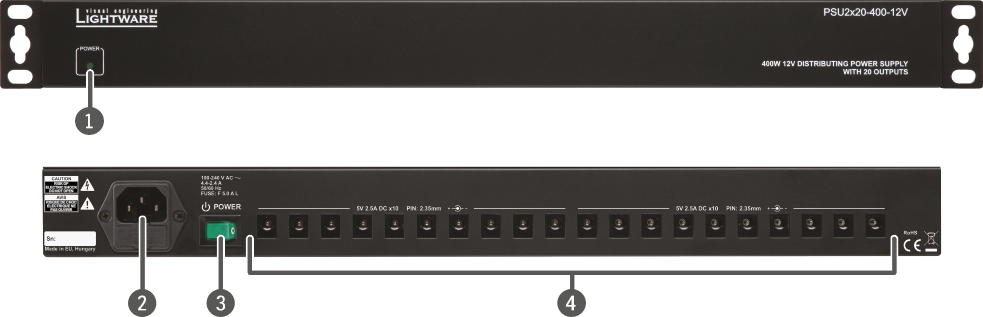
|
|
Power LED |
Power LED lights green when the unit is powered on. |
|
|
AC connector |
Standard IEC power connector. Accepts 100 to 240 Volts, 50 or 60 Hz power sources. |
|
|
Power switch |
The power supply can be switched ON/OFF with this switch. |
|
|
DC connectors |
Locking DC connectors for the appliances that are desired to supply. |


INFO:The main differences among the variants are the number of the DC connectors and the voltage range; PSUx20-400-12V can be seen on the photos.
2.2.1. PSUx10-200-5V and PSUx-10-200-12V

2.2.2. PSUx20-400-5V and PSUx-20-400-12V

This chapter is about the installation of the device and connecting to other appliances, also presenting the mounting options and further assembly steps:
3.1. Assembly of the Rack Ears
Two rack ears are supplied with the product, which are fixed on the left and right side with 8 pcs M4 screws. The ears are removable and can be re-assembled to another position or direction.
WARNING!M4x8 size is the longest allowed screw for fixing the ears to the housing. Using different (e.g. longer) screws may cause damage to the device.
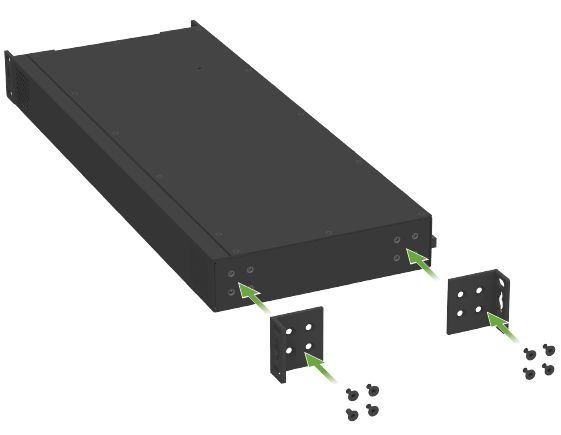
The rack ears allow mounting the device as a standard rack unit installation.
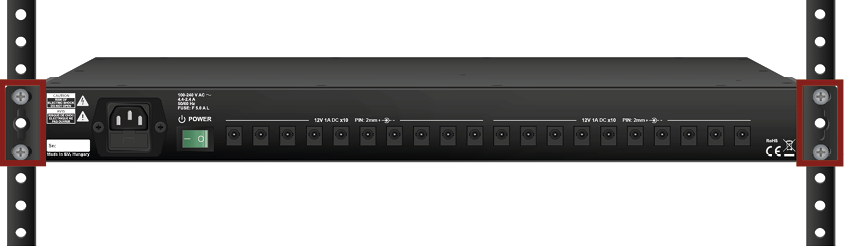
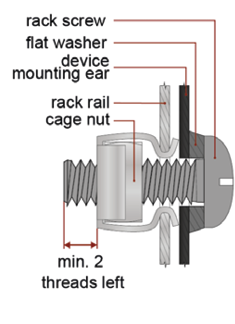
ATTENTION!Always use all the four screws for fixing the device ears to the rack rail. Choose properly sized screws for mounting. Keep a minimum of two threads left after the nut screw.
Ventilation
ATTENTION!To ensure the correct ventilation and avoid overheating, leave enough free space around the appliance. Do not cover the appliance, leave the ventilation holes free on both sides.
DC cables from Lightware contain locking DC connector that establishes robust and safe power connection. After plugging it in, turn the plug clockwise as shown on the picture:

INFO:Do not forget to turn the plug counterclockwise before trying to disconnect the cable.
Step 1.Place the power supply unit in the rack and fix it by screws with the mounting ears.
Step 2.Connect the DC cables to the power supply and to the extender units.
Step 3.Connect the AC power cable to the power supply.
Step 4.Switch on the appliance.
ATTENTION!If the power supply cannot be switched on, please check the IEC power cable, the AC mains and the fuse at the AC connector on the back of the unit. If the LED on the front panel does not light up at all, the unit is most likely damaged and further use is not advised. Please contact support@lightware.com.
INFO:Please note that fixing screws and DC power cables are not supplied with the appliance.
Tables, drawings, guides, technical details and the hashtag keyword list as follows:
INFO:Specifications are subject to change without notice.
General
|
Compliance |
CE, UKCA |
|
EMC (emission) |
EN 55032:2015+A1:2020 |
|
EMC (immunity) |
EN 55035:2017+A11:2020 |
|
RoHS |
EN 63000:2018 |
|
Electrical safety |
EN 62368-1:2024 |
|
Warranty |
3 years |
|
Cooling |
Fan (2 pcs., 40 mm diam.), air flows right to left (front view) |
|
Protection against |
Short circuit / Overload / Over voltage / Over temperature |
|
Operating temperature |
0 to +50˚C (+32 to +122˚F) |
|
Storage temperature |
-40° to +85˚C (-40° to +185˚F) |
|
Operating humidity |
10% to 90%, non-condensing |
Power
|
Power supply option |
built-in PSU |
|
Supported power source |
100-240 V AC; 50/60 Hz |
|
AC fuse |
F 5 A |
|
Models |
PSU2x10-200-5V |
PSU2x20-400-5V |
PSU2x10-200-12V |
PSU2x20-400-12V |
|
DC output number |
10 |
20 |
10 |
20 |
|
Nominal power |
200 W |
400 W |
200 W |
400 W |
|
DC output voltage |
5V |
12V |
||
|
Rated current per output port |
2.5A |
1.1A |
||
|
Heat dissipation (max.) |
683 |
1365 |
683 |
1365 |
Connectors
|
AC power connector |
IEC C14 receptacle |
|
DC power connector (5V version) |
locking DC connector, 2.5/5.5 mm |
|
DC power connector (12V version) |
locking DC connector, 2.1/5.5 mm |
Enclosure
|
Rack mountable |
Yes, 1U high |
|
Enclosure material |
1 mm steel |
|
Dimensions in mm |
482* (446)W x 182D x 43.9H |
|
Dimensions in inch |
19* (17.6)W x 7.2D x 1.8H |
|
Net Weight (PSU2x10-200 series) |
2870 g (6.33 lbs) |
|
Net Weight (PSU2x20-400 series) |
3430 g (7.56 lbs) |
* with rack ears
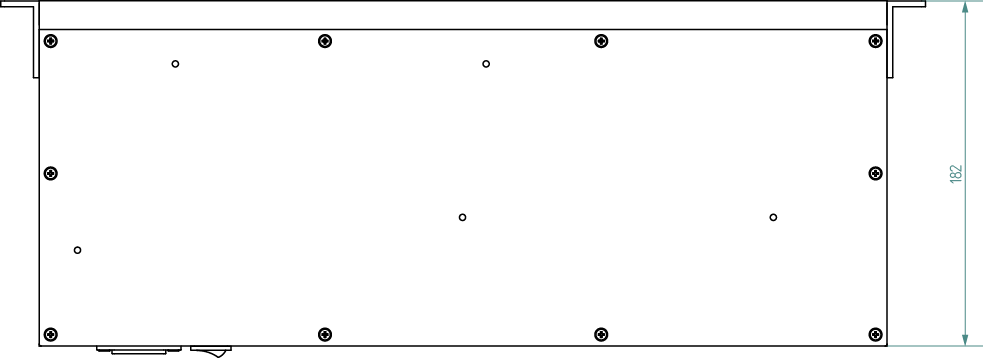
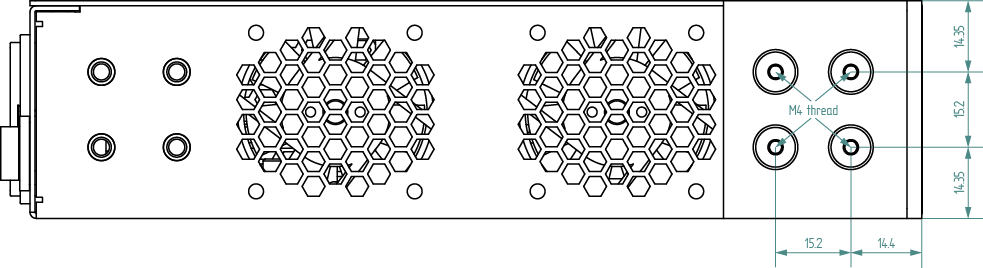
The following drawings present the physical dimensions of the PSU2x series device. Dimensions are in mm.
Front View

Rear View

Top View
Side View
4.3. Further Document Information
Symbol Legend
The following symbols and markings are used in the document:
WARNING!Safety-related information that is highly recommended to read and keep in every case!
ATTENTION!Useful information for performing a successful procedure; it is recommended to read.
DIFFERENCE:Feature or function that is available with a specific firmware/hardware version or product variant.
INFO:A notice, which contains additional information. Procedure can be successful without reading it.
DEFINITION:The short description of a feature or a function.
TIPS AND TRICKS:Ideas that you may have not known yet, but can be useful.
Navigation Buttons
|
Buttons in the PDF version |
Buttons in the HTML version |
|||
|
|
Navigate to the Table of Contents. |
|
Open the main Table of Contents. |
|
|
|
Go back to the previous page. If you clicked on a link previously, you can go back to the source page by pressing the button. |
|
Navigate to the Online User Manuals webpage. |
|
|
|
Navigate to the Bookmark page. |
|
Navigate to the Bookmark page in this User Manual. |
|
|
|
Visit www.lightware.com. |
|
Download the PDF version of the User Manual. |
|


About Printing
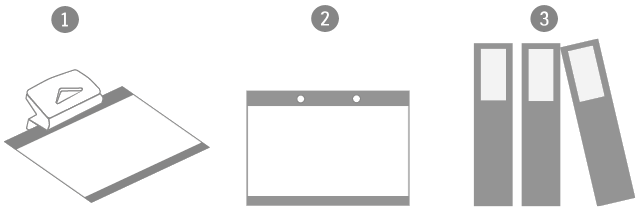
Lightware Visual Engineering supports green technologies and eco-friendly mentality. Thus, this document is made primarily for digital usage. If you need to print out a few pages for any reason, follow the recommended printing settings:
▪Page size: A4
▪Output size: Fit to page or Match page size
▪Orientation: Landscape
TIPS AND TRICKS: Thanks to the size of the original page, a border around the content (gray on the second picture below) makes it possible to organize the pages better. After punching holes in the printed pages, they can easily be placed into a ring folder.
4.4. Limited Warranty Statement
1. Lightware Visual Engineering PLC (Lightware) warrants to all trade and end user customers that any Lightware product purchased will be free from manufacturing defects in both material and workmanship for three (3) years from purchase unless stated otherwise below. The warranty period will begin on the latest possible date where proof of purchase/delivery can be provided by the customer. In the event that no proof can be provided (empty ‘Date of purchase’ field or a copy of invoice), the warranty period will begin from the point of delivery from Lightware.
1.1. 25G and MODEX product series will be subject to a seven (7) year warranty period under the same terms as outlined in this document.
1.2. If during the first three (3) months of purchase, the customer is unhappy with any aspect of a Lightware product, Lightware will accept a return for full credit.
1.3. Any product that fails in the first six (6) months of the warranty period will automatically be eligible for replacement and advanced replacement where available. Any replacements provided will be warranted for the remainder of the original unit’s warranty period.
1.4. Product failures from six (6) months to the end of the warranty period will either be repaired or replaced at the discretion of Lightware. If Lightware chooses to replace the product, then the replacement will be warranted for the remainder of the original unit’s warranty period.
2. The above-stated warranty and procedures will not apply to any product that has been:
2.1. Modified, repaired or altered by anyone other than a certified Lightware engineer unless expressly agreed beforehand.
2.2. Used in any application other than that for which it was intended.
2.3. Subjected to any mechanical or electrical abuse or accidental damage.
2.4. Any costs incurred for repair/replacement of goods that fall into the categories above (2.1., 2.2., 2.3.) will be borne by the customer at a pre-agreed figure.
3. All products to be returned to Lightware require a return material authorization number (RMA) prior to shipment, and this number must be clearly marked on the box. If an RMA number is not obtained or is not clearly marked on the box, Lightware will refuse the shipment.
3.1. The customer will be responsible for in-bound, and Lightware will be responsible for out-bound shipping costs.
3.2. Newly repaired or replaced products will be warranted to the end of the originally purchased product's warranty period.